
Your mouth guard has spent hours pressed against your teeth every night, soaking in saliva, bacteria, and food bits. Without a regular cleaning routine, that protective device pretty quickly turns into a breeding ground for all sorts of nasty microorganisms. The good news is that keeping your mouth guard fresh, safe, and in top condition only takes a couple of minutes a day.
What is a Mouth Guard and Why Does it Need Cleaning?
A mouth guard, also known as a night guard, occlusal guard, or mouth protector, is a little dental appliance that gets popped over the top of your mouth to protect against teeth grinding, clenching, or sports-related accidents. Mouth guards can be custom-made, boil-and-bite, or ready-made sports guards; each type has its own cleaning method.
Because mouth guards get exposed to saliva and all the bacteria in your mouth while you’re wearing them, it’s not long before microorganisms and biofilm start accumulating on the surface. If you don’t give it a good clean and proper storage, you might find it’s become a breeding ground for bacteria like Streptococcus mutans and fungi such as Candida. Keeping it clean every day really does help control this buildup and keep your oral hygiene in top nick.
The terrible consequences of neglecting cleaning include:
- Bad breath from the stinky compounds that bacterial buildup produces.
- Gingivitis, gum irritation, and an increased risk of cavities
- Fungal infections like oral thrush, especially if you have a dry mouth
- Potential breathing problems from breathing through a dirty mouthguard
- The life of the guard gets shortened by years; it can warp, become stained, and get rough to the touch
If you let bacteria build up on your mouthguard, it can lead to gum irritation and bad breath that even regular toothbrushing can’t fix. By keeping it clean and putting it back in a nice, neat case, you can extend its life, make sure it fits properly, and keep your oral health on the right track.
Daily Cleaning Routine: How to Clean Mouth Guard in 2 Minutes
Daily cleaning is the key to keeping your mouthguard or night guard in top condition, odor-free, and ready to use. It’s a simple 2-minute job that helps get rid of saliva, debris, and surface buildup before they start to build up.
Here’s what you need to do every morning after removing your night guard or after each use of any mouthguard:
- Give it a good rinse. Rinse the guard with cool water to get rid of any loose debris. Don’t use hot water, as it can warp the material.
- Gently brush with some gentle soap. Make sure you clean all surfaces inside, outside, and the biting surface for about 30 seconds. Don’t use anything too abrasive, as it can scratch the material.
- Rinse it thoroughly. Rinse off any soap residue with cool water.
- Air it out. Drape it over a clean towel or on a drying rack and let it air-dry for 15-30 minutes before storing it. You don’t want any trapped moisture, as it can cause microorganisms to start growing.
- Keep it in a nice, clean case, away from heat and damp environments.
Use a separate toothbrush for your mouthguard to prevent cross-contamination. If you want to be extra hygienic, do a deep clean once a week using a denture-cleaning tablet or a cleaning solution that’s approved for the material your guard is made of. Don’t use anything that contains alcohol unless your dentist says it’s okay.
A daily cleaning routine gets rid of fresh saliva, plaque, and food debris right after each use. The weekly deep clean kills embedded bacteria, dissolves mineral deposits, and removes staining that your daily brushing can’t get.
Here is a bit of a rough schedule:
| Guard Type | Daily Cleaning | Deep Cleaning |
| Night guard (nightly use) | Every morning after removal | Once per week |
| Sports guard (regular use) | After every practice/game | Every 1–2 weeks |
| Occasional-use guard | After every use | Every 2 weeks |
How to Deep Clean a Mouthguard Once a Week
Surface debris gets cleared up by daily brushing, but there are mineral deposits, stains, and persistent odors that need a bit more extra care. A weekly soak can help keep your mouthguard clean and looking its best. Check your dentist or manufacturer’s instructions to make sure you’re using the right solution for the type of guard you have.
Deep Cleaning Methods: Step-by-Step Options
You can only do one deep clean per session; some people like to swap between methods a week at a time, which works just fine. Each option below has specific instructions, and you can rotate between them. These methods are generally safe for most plastic, acrylic, and silicone guards, but always follow the dentist’s instructions.
Distilled White Vinegar Soak for Mineral Buildup
White vinegar can help loosen those mineral deposits you get on the surface of your mouth guard.
- Mix one part vinegar with three parts water in a clean container.
- Soak the guard for 30 minutes.
- If there are any stubborn deposits, just use a soft toothbrush to gently scrub them away.
- Give the mouthguard a good soak in some cool water to get all the vinegar taste and smell out.
Hydrogen Peroxide Soak for Giving Your Night Guard a Deep Clean
Hydrogen peroxide and water can help knock out any unwanted germs and loosen up any slight stains on the surface. But before you even think about it, you’ve got to check the material your mouthguard is made from and follow the manufacturer’s instructions to the letter.
- Make sure you’re using a cleaning solution that’s specifically designed for your guard. Don’t even think about using a diluted household hydrogen peroxide mix; it’s not a one-size-fits-all solution.
- Pay attention to the recommended concentration and soaking time- don’t try to get clever and do more or less of it than suggested. Follow the instructions.
- Never use a stronger solution or leave it soaking for longer than the instructions tell you to.
- If you’ve been given the all-clear to wear it again, give it a good rinse with clean water.
Denture Cleaning Tablets for a Quick and Easy Deep Clean
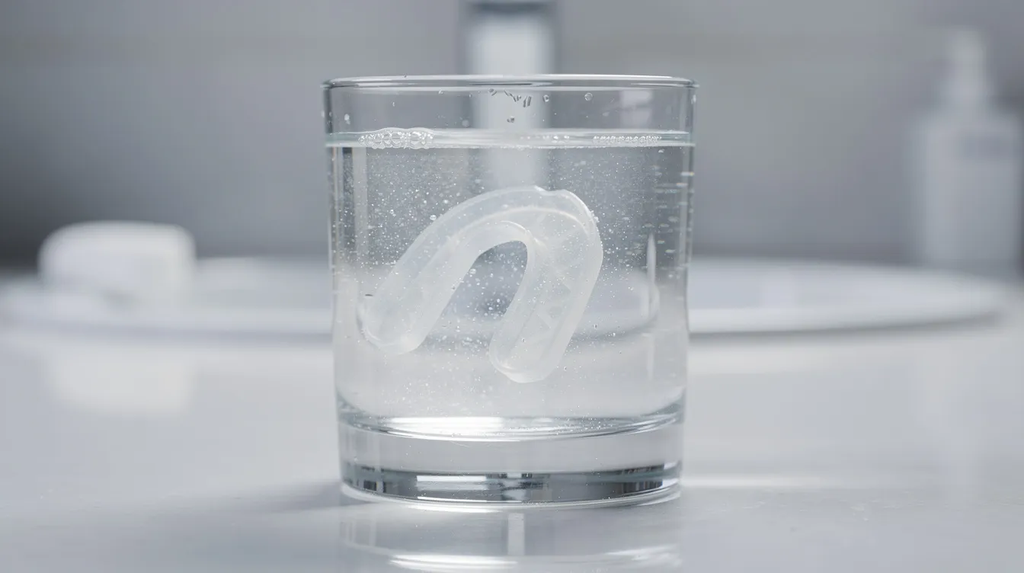
Denture cleaning tablets are a great way to get your mouthguard sparkling clean without messing about with measuring the right amount of cleaning solution. But don’t assume they’re all the same; not all of them are suitable for night guards or sports mouthguards.
- Grab a clean glass or bowl and fill it with some cool or lukewarm water.
- Pop in the tablet and follow the instructions on the package.
- Let it soak for the recommended time- don’t skip this bit.
- Give it a good rinse and check the instructions again before putting it back in your mouth.
Baking Soda Paste or Dip for Getting Rid of Yucky Odors
Baking soda is great for neutralising odours and getting rid of any light surface staining. Just be gentle when using it so you don’t scratch the appliance.
| Method | Recipe | Time |
| Paste | Mix equal parts baking soda and water. | Brush gently for about 60 seconds. |
| Soak | Dissolve 2 teaspoons of baking soda in 1 cup of water. | Soak for 15–20 minutes. |
When using the paste, use a soft-bristled toothbrush to gently clean the inside and outside surfaces. Don’t scrub too hard. When using the dip, let it soak for the recommended time and then give it a good rinse afterwards.
Once you’ve cleaned your mouthguard, make sure it’s thoroughly rinsed and completely dry before storing it in a clean, well-ventilated case. If it starts to look cloudy, cracked, rough, or has a funny smell you can’t get rid of, it’s time to give your dentist a call; don’t try to sort it yourself.
Keeping a Clean Night Guard: Custom vs. Boil and Bite vs. Stock
The basics of cleaning are the same for all guards, but the materials used and how long they last can be a bit different.
- Custom night guard: Made from a dental impression and a higher-grade material that’s a bit more hard-wearing. A custom mouthguard can last 3 to 5 years if you look after it, and some of the hard acrylic ones can even go on a bit longer. They’re less likely to get distorted and can be adjusted by your dentist if your bite changes.
- Boil-and-bite guard: A softer thermoplastic material that gets moulded to your teeth when you heat it up in water. The downside is that it’s more prone to staining and harbouring bacteria. They typically last around 6 to 12 months for people who wear them every night, but not as long if you’re a heavy grafter.
- Stock guard: A pre-formed, one-size-fits-all sports mouthguard. They’re a bit more basic in construction and will probably need replacing every few months when they start to wear out.
Custom guards need a bit more TLC to keep them in good nick; avoid heat and harsh chemicals at all costs. Get your mouthguard checked by your dentist regularly to make sure it’s still in good condition.
What Not to Do When Cleaning a Mouthguard
Doing the wrong things can end up damaging the guard or making it unsafe to wear. Here are the things to avoid at all costs.
- Never, ever use hot or boiling water
- Don’t even think about soaking it in bleach or chlorine solutions.
- Whatever you do, don’t use abrasive toothpaste or a whitening toothpaste to try to keep your night guard clean.
- Only soak it in alcohol-free mouthwash if you have to, but never, under any circumstances, use alcohol-based mouthwashes.
- Use a soft-bristled toothbrush or a gentle cleaning cloth; no stiff bristles or scouring pads.
- And for goodness’ sake, don’t store it in a wet case in a gym bag or anywhere else where it can get all damp and harbour bacteria.
How to Store and Travel Safely with Your Night Guard
It’s just as important to get the storing and travelling right as it is to clean your mouthguard. Don’t skip these steps, and you’ll end up with a nice fresh environment for all the bacteria to multiply in.
- Give your mouthguard a good 15 to 30 minutes in the air to dry off completely before storing it. Then pop it in a clean towel or on a well-ventilated rack.
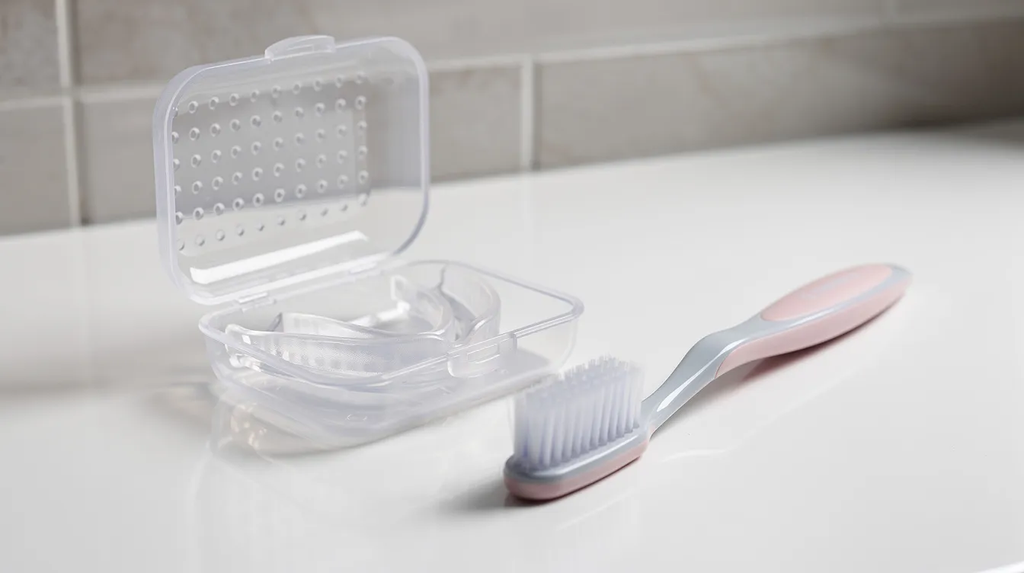
- Store the dry mouthguard in a clean, well-ventilated case. You want a case that lets in some air but keeps dust, pets, and general mayhem out.
- Don’t store it in a hot car or a steamy bathroom; this is just asking for trouble when it comes to bacterial growth.
- Give your case a weekly clean with some mild soap and warm water, then dry it thoroughly before popping your night guard back inside.
For Travel: Always use the labeled mouthguard. Don’t even think about wrapping the guard in napkins or tissues; they’re too easy to just toss out by accident. Pack a small stash of travel-sized cleaning supplies (like travel soap and a soft toothbrush) and give it a good rinse with some cool water as soon as possible after using it.
How Cleaning Affects Bad Breath and Your Overall Oral Health
A gumshield that’s simply not been given a good clean is a sneaky reason for bad breath and a not particularly pleasant morning taste. Bacteria just love to live in a moist mouthguard that hasn’t been properly cleaned, and they release these awful sulphur compounds that’ll slap you in the face the moment you take the thing out.
Doing a good clean every single day, plus keeping your teeth and tongue spotless before popping the guard in, will really cut down on mouth odour. Getting into a routine of brushing your teeth and the guard as well is part of making sure you’ve got a clean environment to start with.
But if “that” mouth guard smell just won’t go away, even after doing all the right cleaning and a deep clean once a week, that’s usually a sign of bacteria that’s worked its way deep into the material of the guard itself rather than just sitting on the surface. When that happens, it’s either a sign that the guard is damaged and needs to be replaced or that you’ve got some underlying oral health issues going on (like dry mouth, acid reflux, or some untreated dental disease) which you should probably go and have a chat with your dentist about.
Having a clean night guard is especially important for people who’ve already got a few things stacked against them (dry mouth, acid reflux, or one of those fiddly orthodontic dental things), ’cause they’re more at risk of getting enamel erosion and cavities.
When to Chuck a Mouthguard and Get a New One
Even if you’ve been following all the right cleaning rules, every guard has a sell-by date, and it’s time to get a new one when it’s no longer doing its job properly. Take a good, hard look at your mouthguard on a regular basis and check for any signs that it’s starting to fall apart.
You should replace your guard if:
- You can see cracks or holes in it- sorry, a bit of cleaning’s not going to put that right.
- The bite surface is all flattened out and no longer doing its job
- The edges are all rough and sharp and digging into your cheeks or tongue
- The smell just won’t budge no matter how well you clean it
- You can see stains after you’ve given it a good clean; that’s a sign the material’s got too contaminated to clean properly
- It just doesn’t feel right in your mouth- either too loose, too tight, or it keeps shifting around while you’re trying to sleep. That usually means it’s warped or your bite has changed.
Approximate lifespans with proper care:
| Guard Type | Expected Lifespan |
| Custom night guard | 3–5 years |
| Boil and bite guard | 6–12 months |
| Sports guard (stock) | 1 season (3–6 months) |
FAQ
Can I clean my mouthguard with regular toothpaste?
Standard toothpastes are too abrasive and scratch plastic over time, creating micro-grooves that harbor bacteria and odors. Use mild dish soap, clear gel, or non-abrasive toothpaste instead.
Is it safe to soak my mouthguard overnight?
No, prolonged soaking in solutions like peroxide or vinegar weakens, distorts, and ruins the material. Limit soaks to 10 to 30 minutes, rinse with cool water, and air dry completely.
What should I do if I forget to clean my night guard one morning?
Rinse it immediately with cool water, then perform a full daily clean and deep soak later that day. Occasional slips are fine, but frequent neglect causes stubborn bacteria and staining.
How can I deep clean my mouthguard if I don’t have denture tablets or vinegar at home?
Use baking soda as a backup by mixing it with water into a gentle cleaning paste or dissolving it in a cup for a 15-minute soak.